✖

✖

✖

✖

We provide a 24-month warranty on all of our products.

We take immense pride in our products and know you're going to love them as much as we do. If you're not 10/10 obsessed, let us know within 30 days for our 100% money back guarantee.

 ✕
✕
Check out with Sezzle and split your entire order into 4 interest-free payments over 6 weeks.
On all orders $75USD+ we offer free 2-7 business day standard shipping in the US + CA and 11-20 business day shipping in the UK.
Unfortunately we are unable to make deliveries to PO boxes, APO/FPO, or US military bases outside the US.


 AMELIA
 MACY
MACY
 TAYLOR
 CLARA
CLARA
 RIVO
RIVO
 THE ROYAL RITUAL
 SOFT & SMOOTH BODY KIT
 TRU-GLOW DUO
 SHINE & STOW
 MADELINE
 TRAVELING TWOSOME
 TOUCH-UP TOOL KIT
 TORRI
TORRI
 MILA
MILA
 ABIGAIL
 VERA + LARA
 ISLA
ISLA
 DEMI
DEMI
 ON-THE-GLOW DUO
 GLOWING PLACES KIT
 PORE-PARAZZI SET
 VERA
VERA
 TASHA
TASHA
 MICA
MICA
 CALI
CALI
 MADISON
 REMI
REMI
 ARIA
ARIA
 THE GLOW GETTER RITUAL
 FIRST CLASS GLOW
 2 BE LIT
 BEAUTY FIRST AID
 MONROE
 CAMI
CAMI
 LANA
LANA
 LARA
LARA
 MIRA 2
 ELLE
ELLE
 CORA 3
 ZORA
ZORA
 AEVA
AEVA
 TOE-TALLY NAILED IT
 NALA
NALA
 ZOE EYE
 AROMA
AROMA
 BLISS KIT
 VACAY-GLOW DUO
 AUDREY
 TALA
TALA
 ELLE - 3 PK
 MYNT
MYNT
 CORA BRUSHES
 DAILY ESSENTIALS
 ZOE CLEANSE
 NALA + MILA
 CALI REPLACEMENT HEADS
 CORA 3 BRUSHES
 LOLA
LOLA
 ZOE 360
 CHARLOTTE
 MYNT SANDPAPER REPLACEMENTS
 MYNT REPLACEMENTS
 CORA 3 BUNDLE
 ZOE DRY
 MANDY'S FAVES
 CLARA ESSENTIAL KIT
 LOLA REPLACEMENT
 LOLA SANDPAPER REPLACEMENTS
 AUDREY 3PK
 DOUBLE CLEANSE DUO
 TARA
TARA
 FACIAL HIIT SET
![GIFT CARD [USD]](http://fancii.com/cdn/shop/products/fancii-gift-card_45x.gif?v=1618412507) GIFT CARD [USD]
GIFT CARD [USD]
![GIFT CARD [CAD]](http://fancii.com/cdn/shop/products/fancii-gift-card_8caf3995-16f8-44ab-90b2-3aa4b3050424_45x.gif?v=1644010521) GIFT CARD [CAD]
GIFT CARD [CAD]
![GIFT CARD [GBP]](http://fancii.com/cdn/shop/products/fancii-gift-card_bda6bc27-1ef2-4efb-bf94-e3f8882f7d97_45x.gif?v=1644010621) GIFT CARD [GBP]
GIFT CARD [GBP]
 FARAH
FARAH
 A MOMENT FOR MOM KIT
We love a bright, bold lip as much as the next gal, but there's just something about a low key natural and full looking pout. It's just so versatile, classic and wearable!
In today's blog, makeup artist, Carina from Toronto, takes us through a step-by-step tutorial for creating a full lip look that is not only simple to apply, but oh-so natural as well.
STEP 1: TAKE A GOOD LOOK AT YOUR LIPS
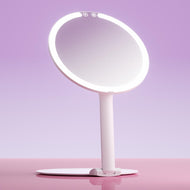
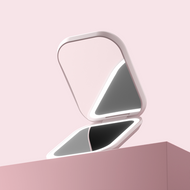
When it comes to lips, being able to clearly see what you're doing is sooo important for a nice, crisp application. It can be hard to stay in the lines on a good day, so we are totally obsessed with using a magnifcation mirror, like Mila, to make sure we can see everything clearly while also avoiding any Bad Beauty Lighting™ mishaps.
STEP 2 : LINE YOUR LIPS
Starting at the corner of your lip, line your lips, following your natural lip line but over-drawing just slightly. For a more natural look, we recommend using a more nude shade, but you can truly use whatever you Fancii!
STEP 3: USE THE LINER TO FILL YOUR LIPS
Fill in your lips, using the same liner you used to line your lips. This will create a nice base for your lipstick and create a beautiful ombre effect that will last.
STEP 4: LIP STICK AND LACQUER
Using a matte, nude lipstick fill in your lips. It's important to use a matte lipstick when overdrawing your lips so it will blend seamlessly, keeping things nice and natural looking. Complete the look with a coat of vinyl lip lacquer, this will help bring everything together.
This is such a great technique to have in you beauty routine toolbox and it's simple to master. We love that it can be glam'd up for a fancy night out or flaunted with a cozy t-shirt and jeans for a chic and casual vibe.
Until next time, stay Fancii, beauty!

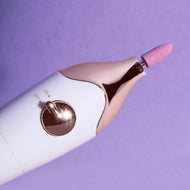
Rechargeable Perfection
$49 USD
Could you list the brands and colors of liner lipstick and gloss?
On June 22, 2021I love an easy tutorial I can actually do lol
On April 22, 2021I love the simplicity of this and can’t wait to try it! Thanks so much for breaking it down like this, Fanii! Even a makeup noob like me can pull this look off. :D
On April 22, 2021Oh my gosh, I can’t believe how easy this is! Definitely going to try this next weekend! Thanks so much, Fancii :)
On April 16, 2021Good tip about the matte lipstick. I didn’t know that before.
On April 16, 2021Love it!! 😍
On April 16, 2021I have tried this before but haven’t done the step where you fill in your lips with the pencil – I like how it results in a softer look after she applies her lipstick
On April 16, 2021